
When project requests are received by the marketing team, someone needs to assign it to the right person for processing based on the project type and organization.
This can be a daunting task depending on the volume of project requests you receive.
In most cases, you have specific person processing specific project types, or even more, specific person processing project requests for a given organization.
For example, what if Bill, the e-commerce manager, should be assigned to all "E-Commerce" project requests, and additionally, the "E-Commerce Specialist" be assigned based on specific organizations.
You can optimize this process by defining multiple level of auto-assign rules when receiving project requests.
Define the roles to auto-assign for a request type
By default, new project requests are not auto-assigned.
To enable auto-assign, you must first define the roles you want to auto-assign for a given project type.
Follow these steps to define the roles to auto-assign for a project type:
Step 1: Go to the Administration module.
Step 2: Go to the Project types & forms sub-module.
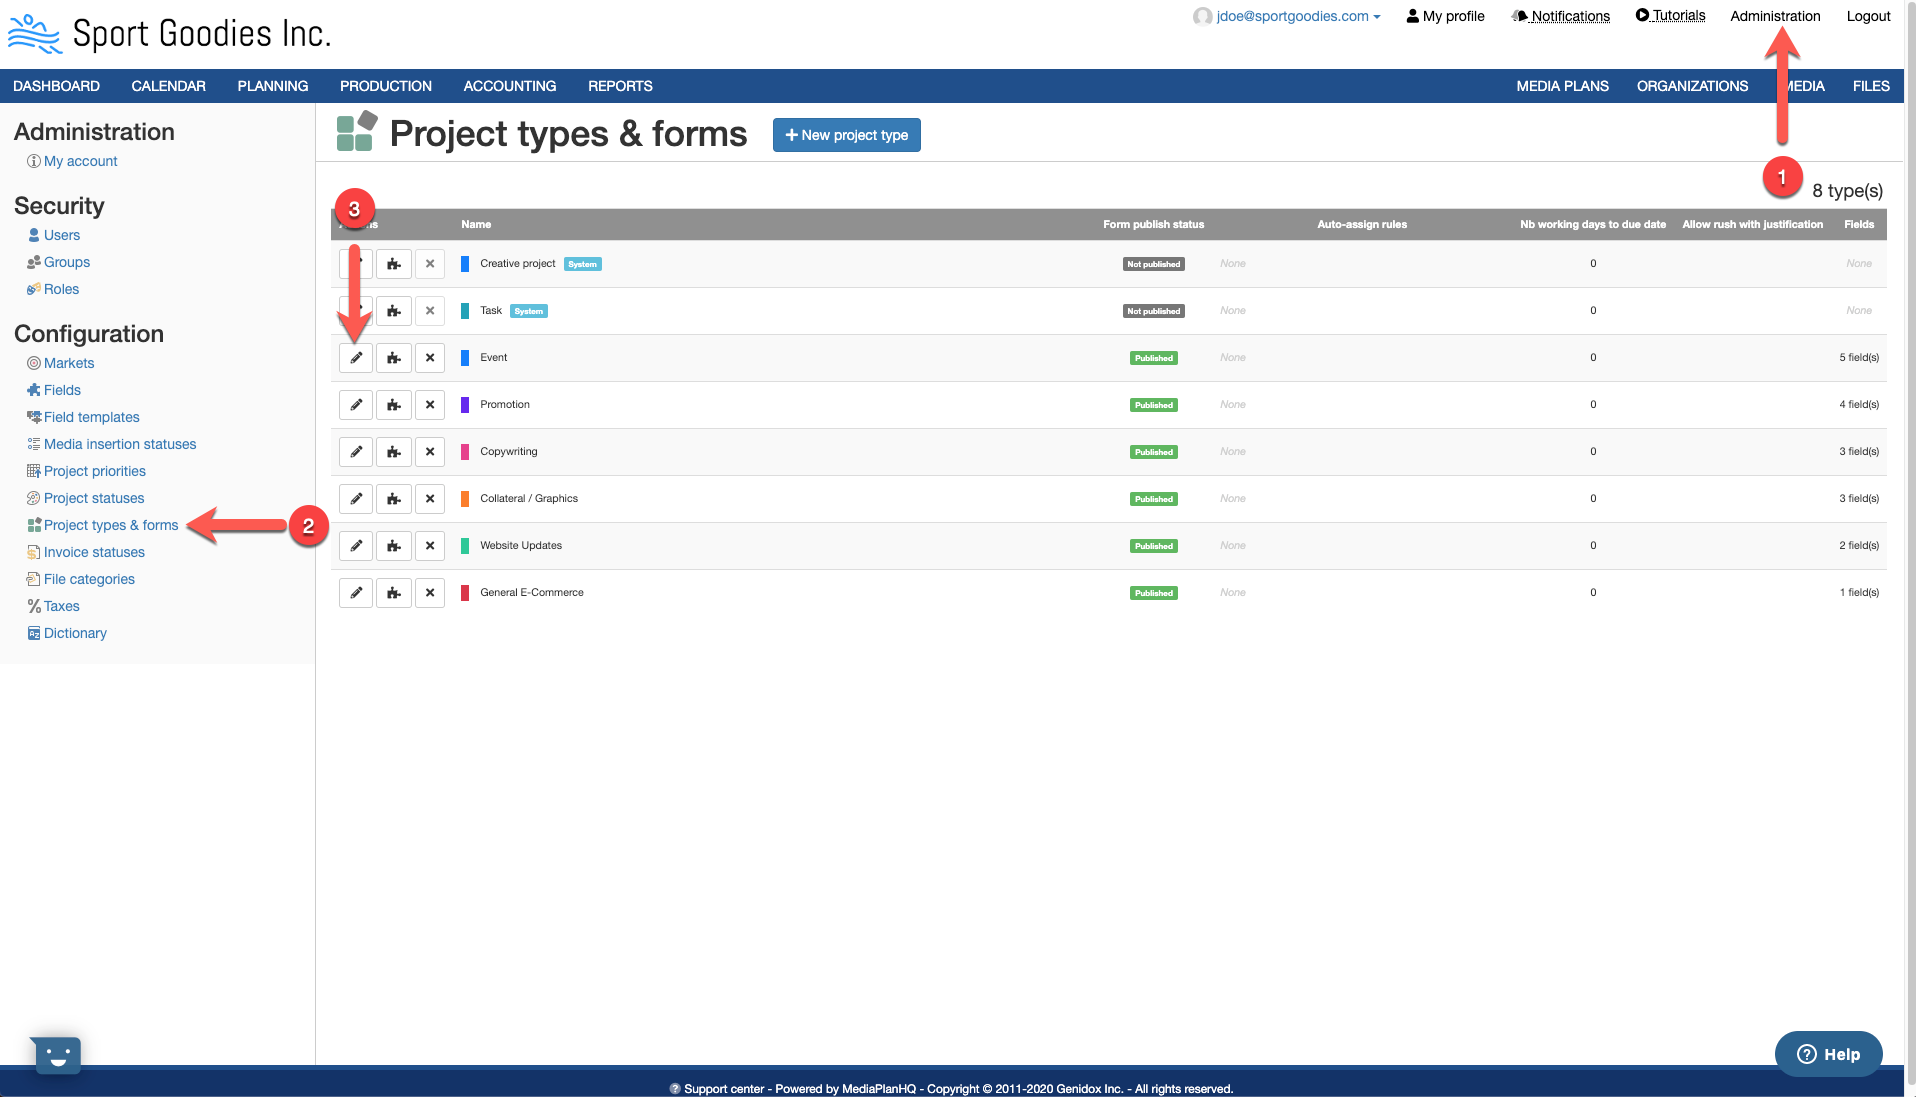
Step 3: Click the Edit button of the project type. This will display the Update project type form.
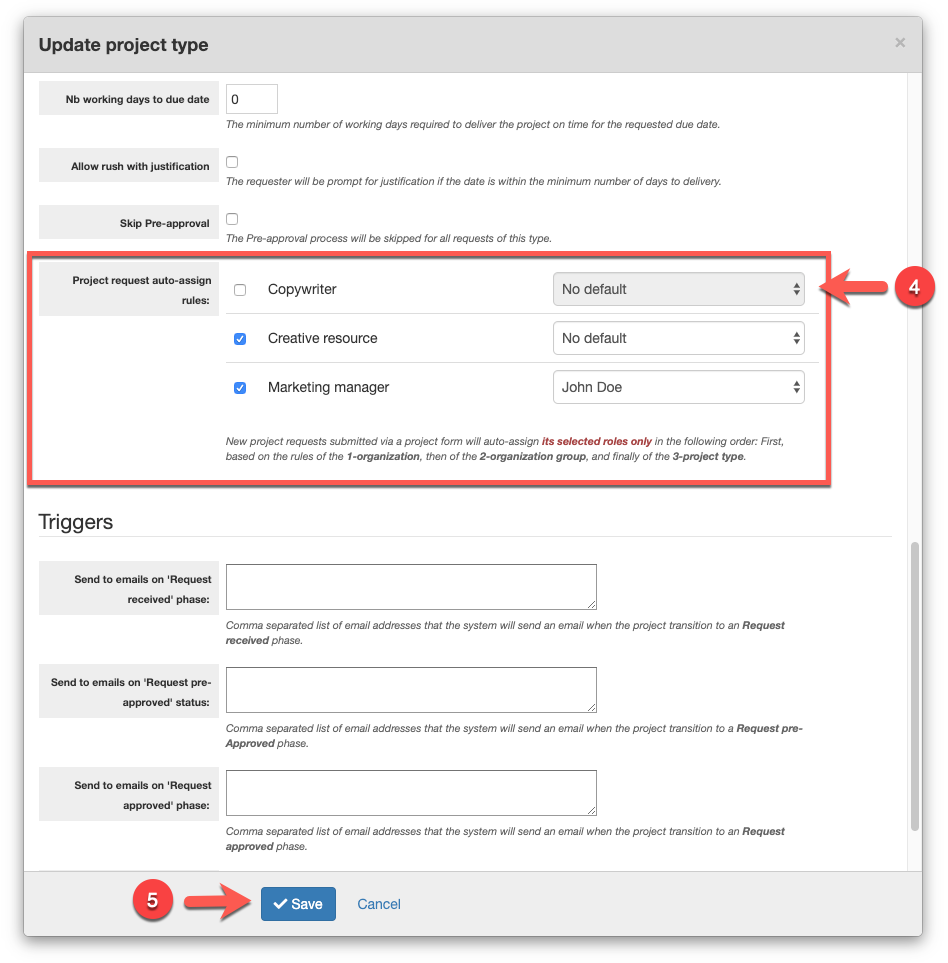
Step 4: Select the roles to auto-assign with an optional default assignee.
New project requests submitted via a project form will only try to auto-assign its selected roles.
Step 5: Click the Save button.
Auto-assign rules by organization group
You can specify similar auto-assign rules on the organization group:
Step 1: Go to the Organizations module:
Step 2: Click on an organization group in the left pane. This will display the organization group details in the right pane.
Step 3: Click the Edit button. This will display the Update organization group form.

Step 4: Configure the auto-assign rules.
Step 5: Click the Save button.
Auto-assign rules by organization
You can also specify the auto-assign rules on the organization:
Step 1: Go to the Organizations module:
Step 2: Click on an organization in the left pane. This will display the organization details in the right pane.
Step 3: Click the Edit button. This will display the Update organization form.

Step 4: Configure the auto-assign rules.
Step 5: Click the Save button.
Understanding the auto-assign step-by-step
When the system receives a new project request, it will auto-assign the roles selected for the project type and will go through the 1-organization, 2-organization group, 3-project type to find an assignee.
Based on the above screenshots, the system will try to auto-assign the following roles
- Creative resource
- Marketing manager
Thus, a request for the "Calgary" organization would auto-assign:
- Creative resource to Alex Brown (from the organization group "Alberta"),
- Marketing manager to Jessica Martin (from the organization "Calgary").
Comments
0 comments
Article is closed for comments.